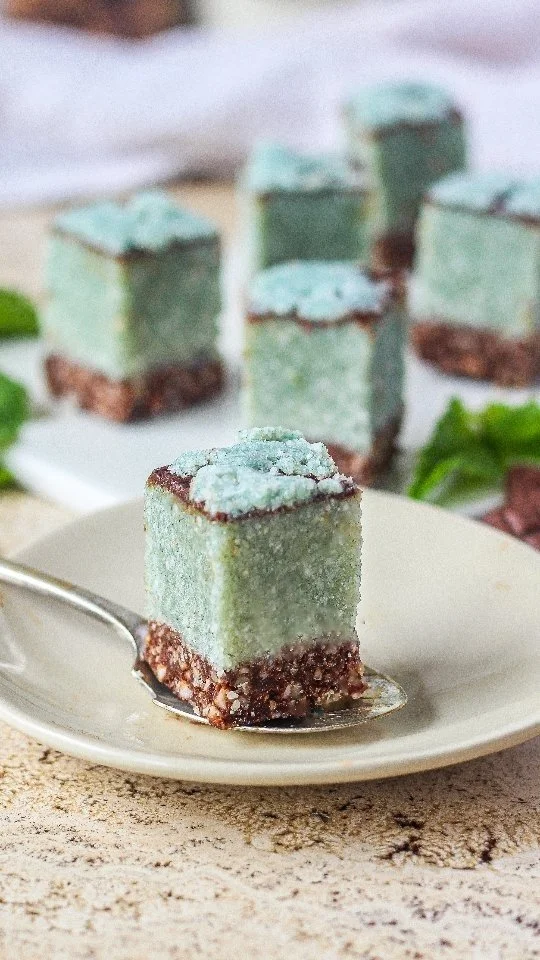
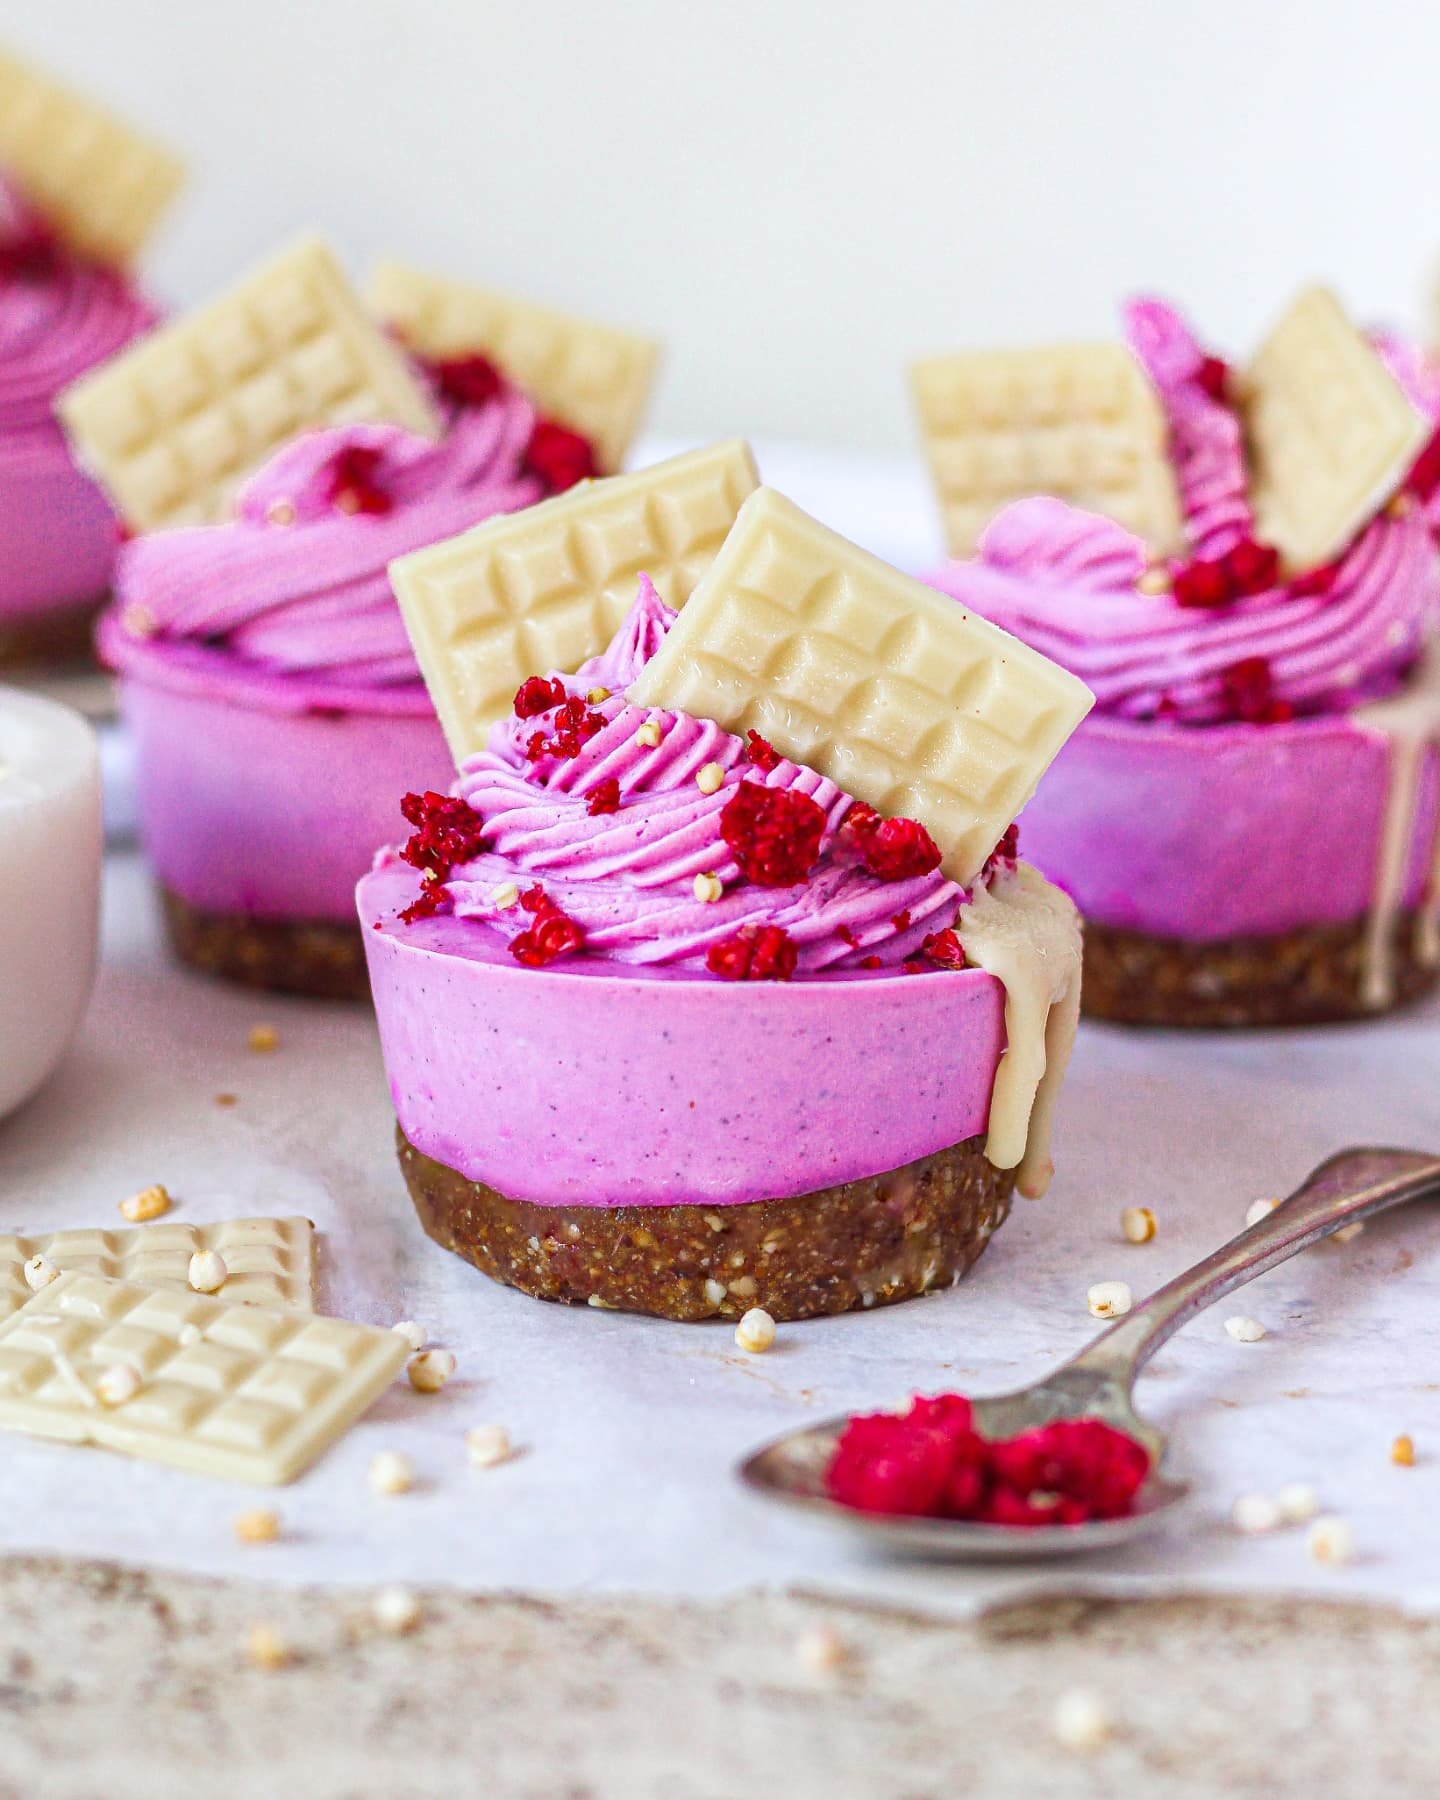
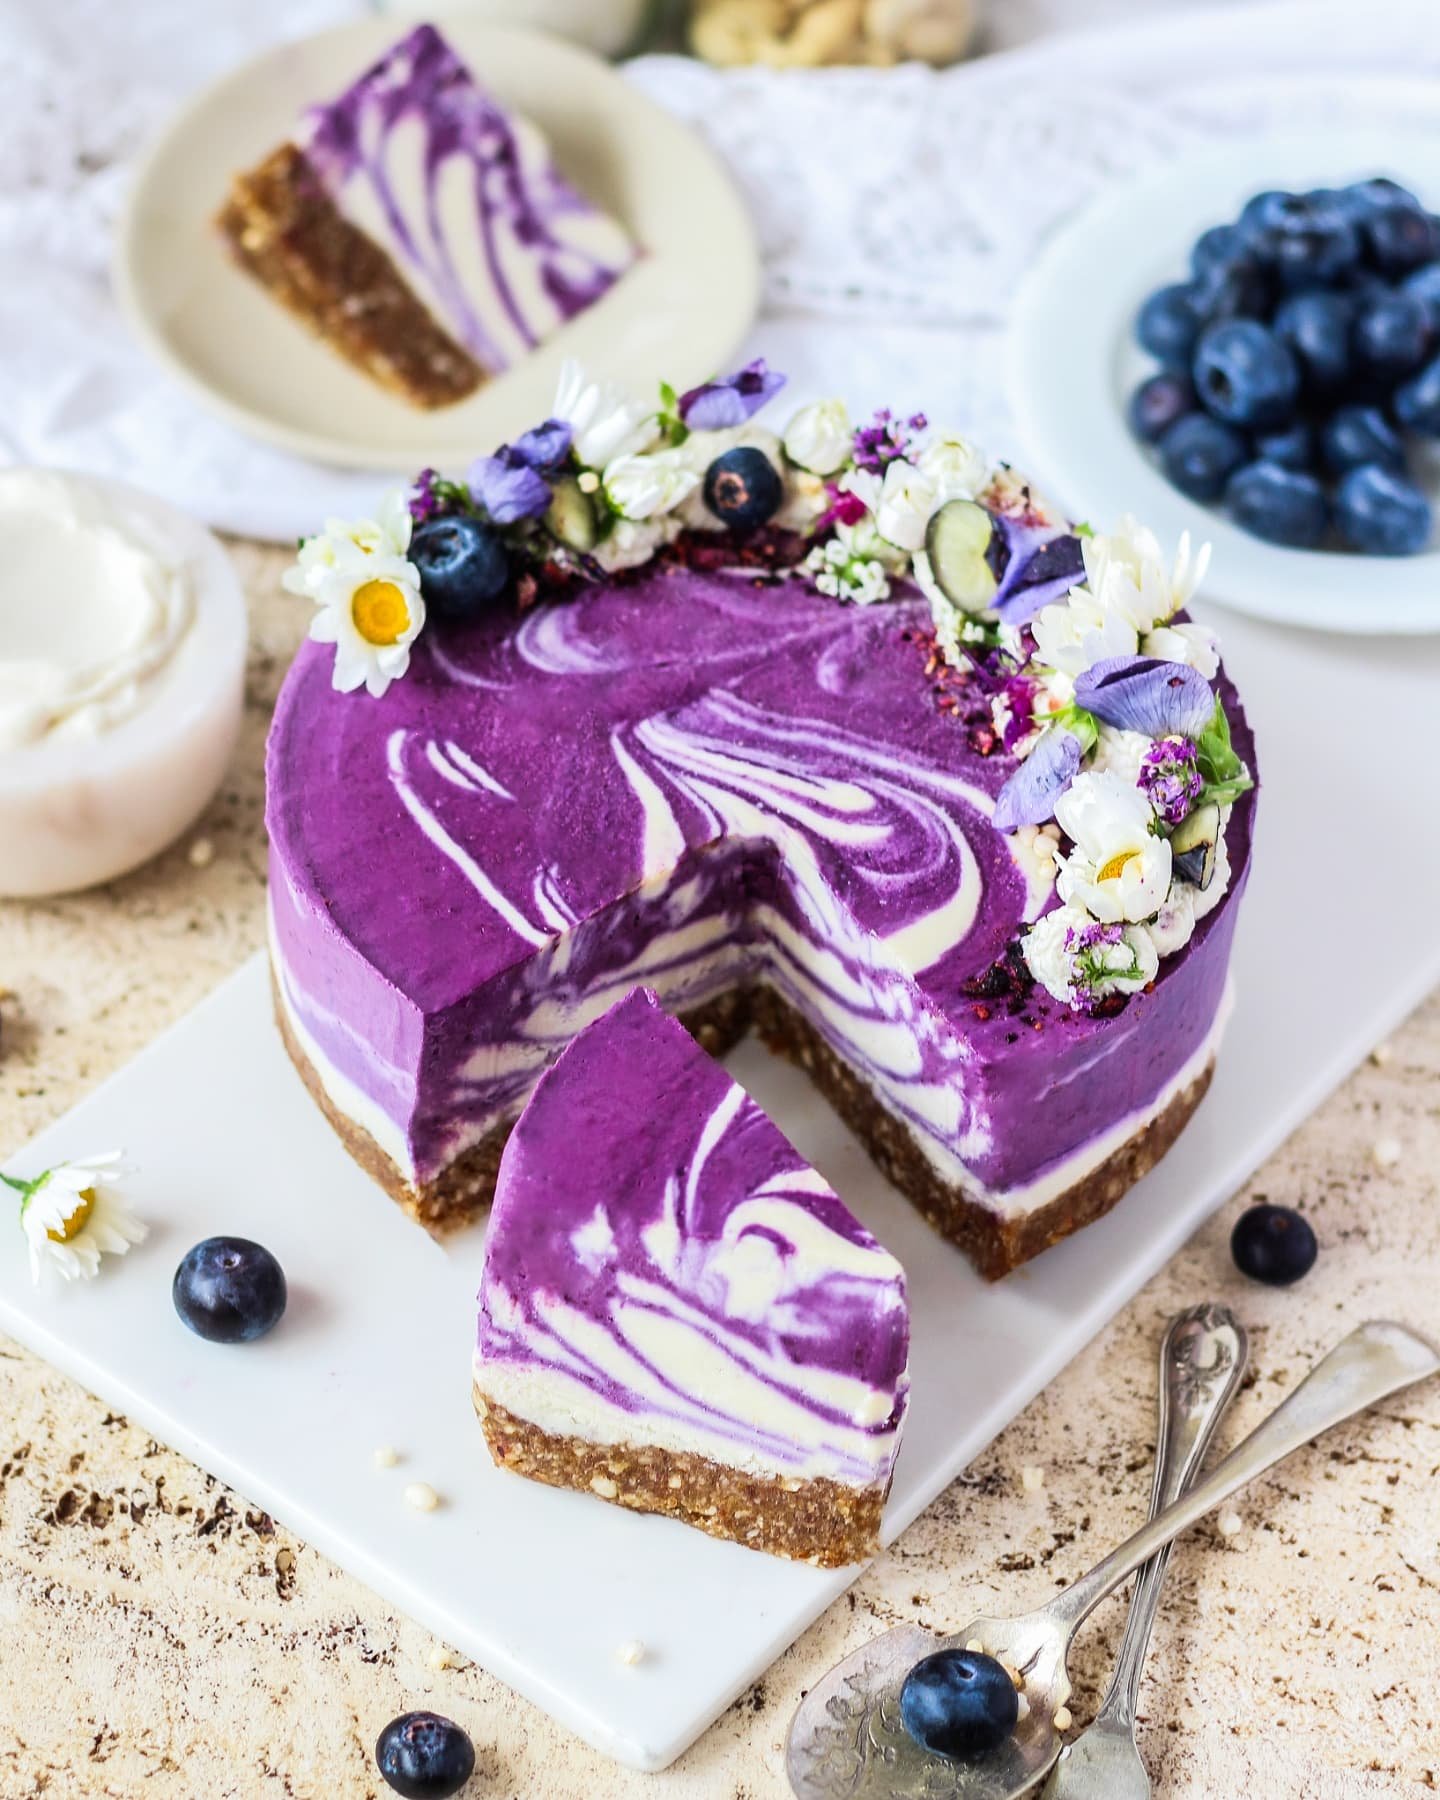
RAW BLUEBERRY SWIRL CHEESECAKE

I am so glad it’s blueberry season, as I can start to whip up some more blueberry desserts! I made this no-bake blueberry swirl cheesecake, and I am in love with the creaminess and zesty punch of the two layers when combined! 🫐
Refined Sugar-Free, Gluten Free, Vegan
Cooking Time: 2 hours / Setting: 8 hours or overnight / Makes 1 x 15cm cake
RAW BLUEBERRY SWIRL CHEESECAKE
Ingredients:
Base:
• ½ cup raw pecans
• ½ cup almonds
• 9 large medjool dates, pitted (soaked in water for 10 minutes beforehand)
• ¼ tsp salt
Vanilla layer:
• 2 cups raw cashews (soaked in water for four hours)
• ¾ cup canned coconut milk (refrigerated/thick part from the can)
• ¼ cup melted cocoa butter
• ⅓ cup rice malt syrup or pure maple syrup
• 1 tsp lemon zest
• ¼ cup lemon juice
• 1 tsp vanilla extract
• ¼ cup @macr0mike vanilla buttercream protein powder (AMB-SAMMYB)
For the blueberry layer:
• 1 and ¼ cup fresh or frozen blueberries (thawed if frozen)
• 1 tbs fresh lemon juice
• 1 tbs maple syrup
Method:
1. Line the bottom of a 15cm round spring form tin with baking paper. For the base, process your nuts in a high-speed food processor until coarsely ground (approx. 30 seconds), then add your dates and process the mixture again until the mixture starts to stick together when pressed. If it appears dry and crumbly, add an extra date or a splash of water and process again. Press your base mixture into the bottom of your tin and evenly spread the mixture along the entire base of the tin. Place your base in the fridge whilst you make your filling.
2. In a small saucepan, cook your blueberries with your lemon juice and maple syrup for approximately 7 minutes until they begin to soften. Remove from the heat and set the mixture aside to cool.
3. Cheesecake layer: Drain your cashews and then add all your vanilla layer ingredients to a @vitamix or high-speed food processor and process for 1-2 minutes until the mixture is completely smooth and free of lumps. Transfer 1/3 of your cream mixture into a separate bowl and set aside. Add your blueberry mix to the cream mixture in your Vitamix and process for 1-2 minutes until the mixture is completely smooth and free of lumps.
4. Transfer 1/3 of your cream mixture into a separate bowl and set aside. Add your blueberry mix to the cream mixture in your Vitamix container and process again until your mixture is smooth and creamy.
5. Pull your base out of the fridge and spoon approximately ¼ cup of your blueberry mixture onto the bottom of your base. Tap on the bench to even out, it should cover the bottom of your tin with a thin layer. Now add a generous tablespoon of your vanilla layer into the middle of your base and tap on the bench again to allow the mixture to spread out slightly. Add another generous tablespoon of your blueberry mixture in the centre of your vanilla layer and repeat the process until you have used all your cream mixture, each time dropping a tablespoon of mixture into the centre of the tin on top of each other to create a ripple effect. You can optionally reserve a little of the blueberry mixture for piping onto your cake, or you can use all of your mixture into your cake if you prefer. Once you have finished, using a wooden skewer, draw a figure 8 three times through your mixture to allow the mixture to swirl together (this will create a swirl pattern).
6. Place your cake into the freezer to set for 4 hours until set and firm to the touch. If you have leftover blueberry cream, pipe onto the top of the cake using a star piping tip, then place back in the freezer to set for 1 hour. When ready to serve, remove the cake from the freezer, allow it to thaw on the bench for 15-20 minutes before serving and carefully remove the cake from your springform tin. Top with extra fresh blueberries. Enjoy!
Follow me at @adatewithsam for more recipes and photography inspiration!